Click on the above banner for image and description
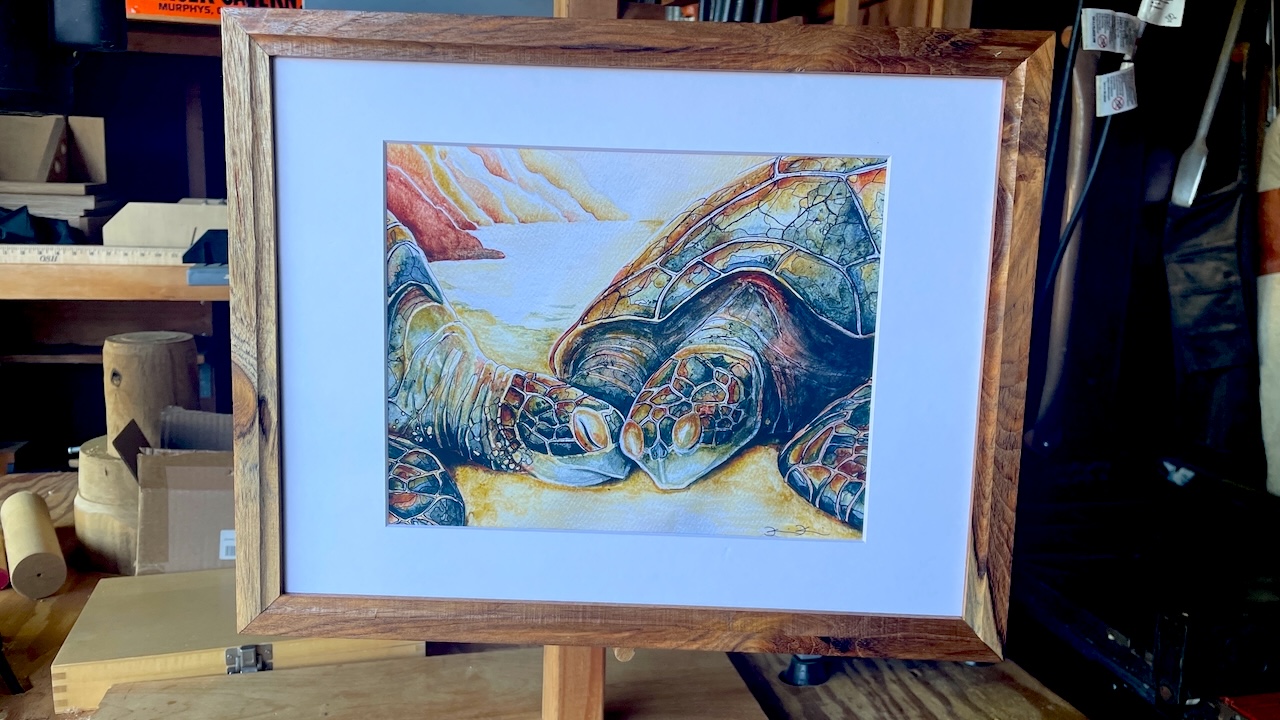
Napali Honu, Kauai, Hawaii11-Jun-2026
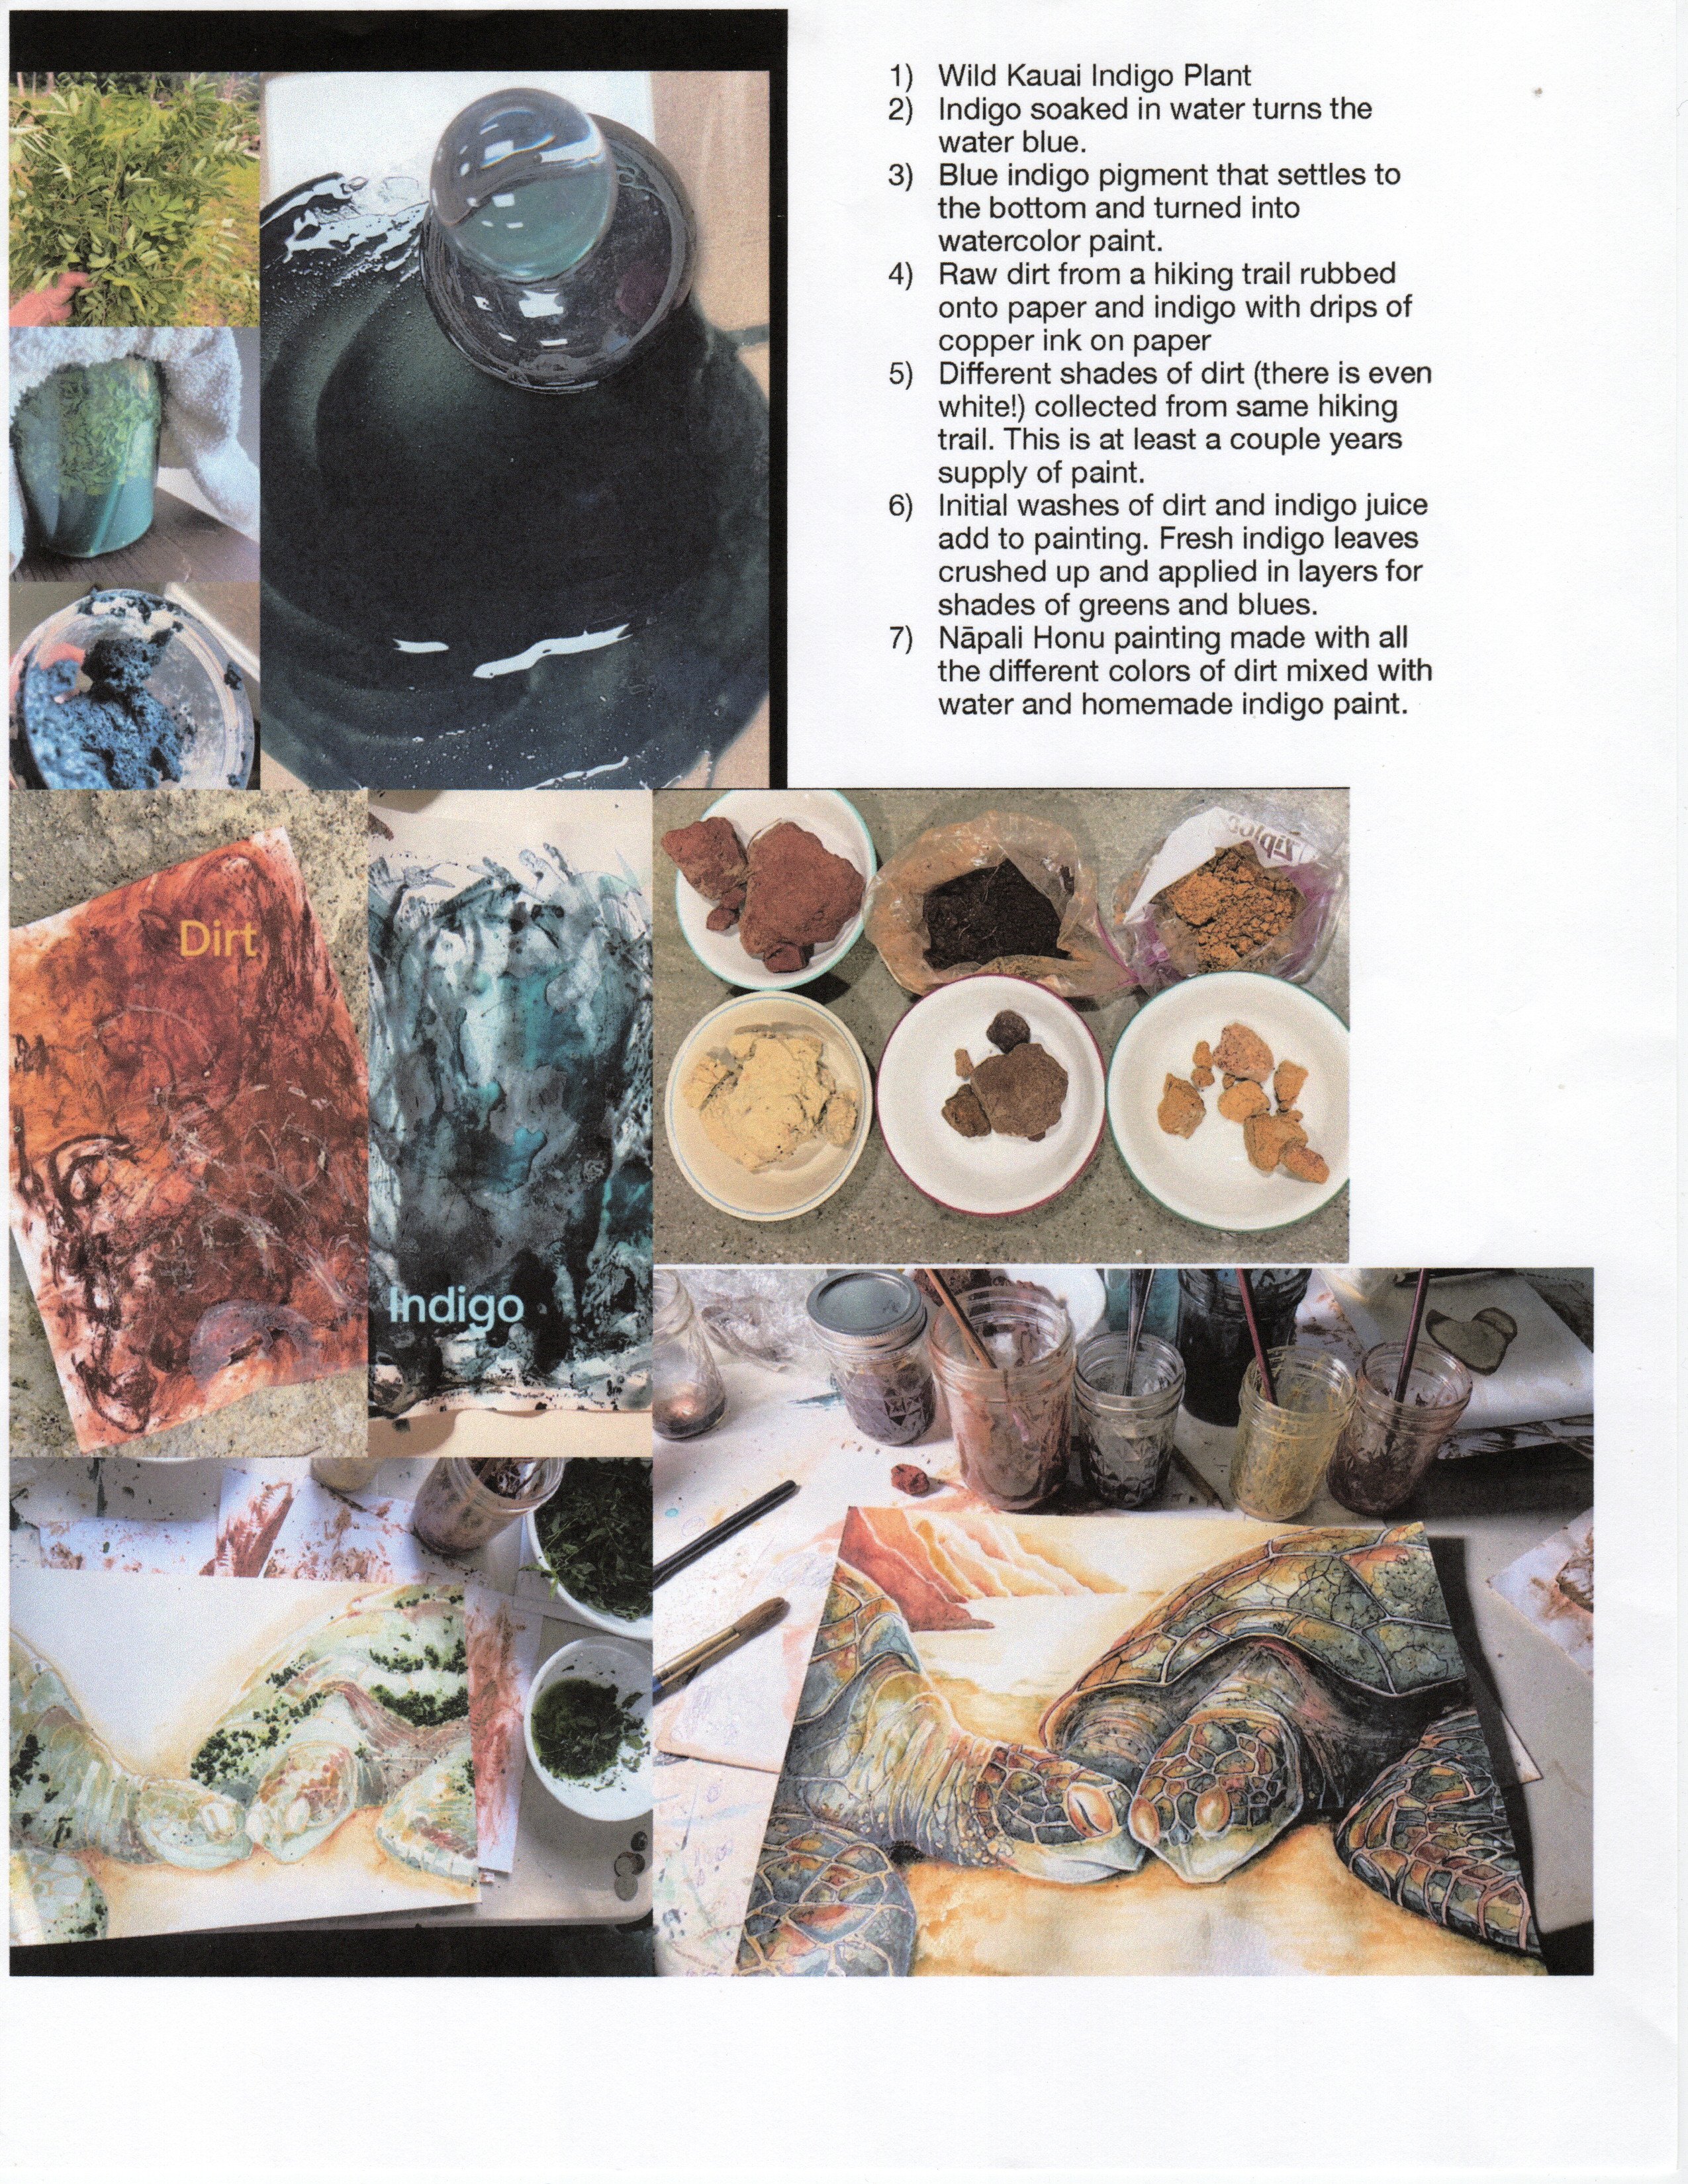
Nature artist Kimberly Kirk lives on Kauai, Hawaii. She makes all her paints from natural
materials found on the island. See KimKirkArtKauai.com Click this image for larger view.
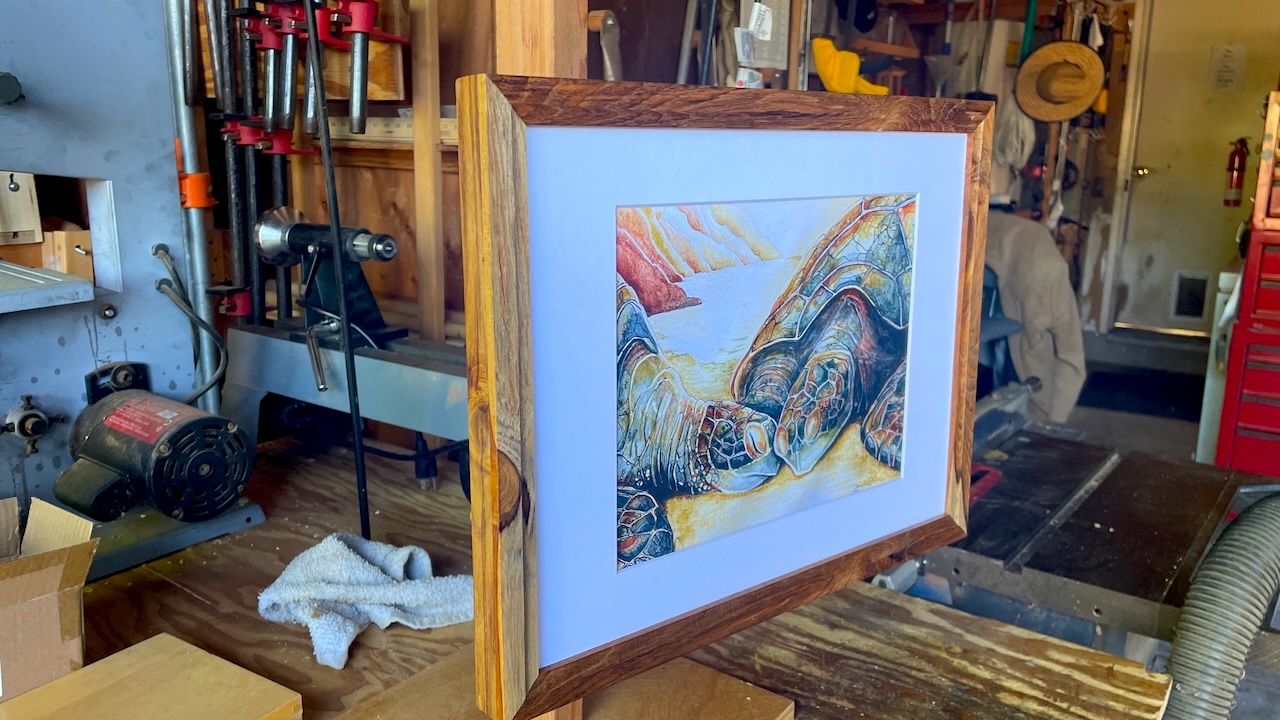
Our daughter Sarah visited the Hawaiian island of Kauai recently and sent us this painting of
sun-bathing turtles. Turtles are a big deal anywhere in Hawaii. Kimberly Kirk is a local artist
who not only paints beautiful art but uses the natural materials found on Kauai. In the gallery
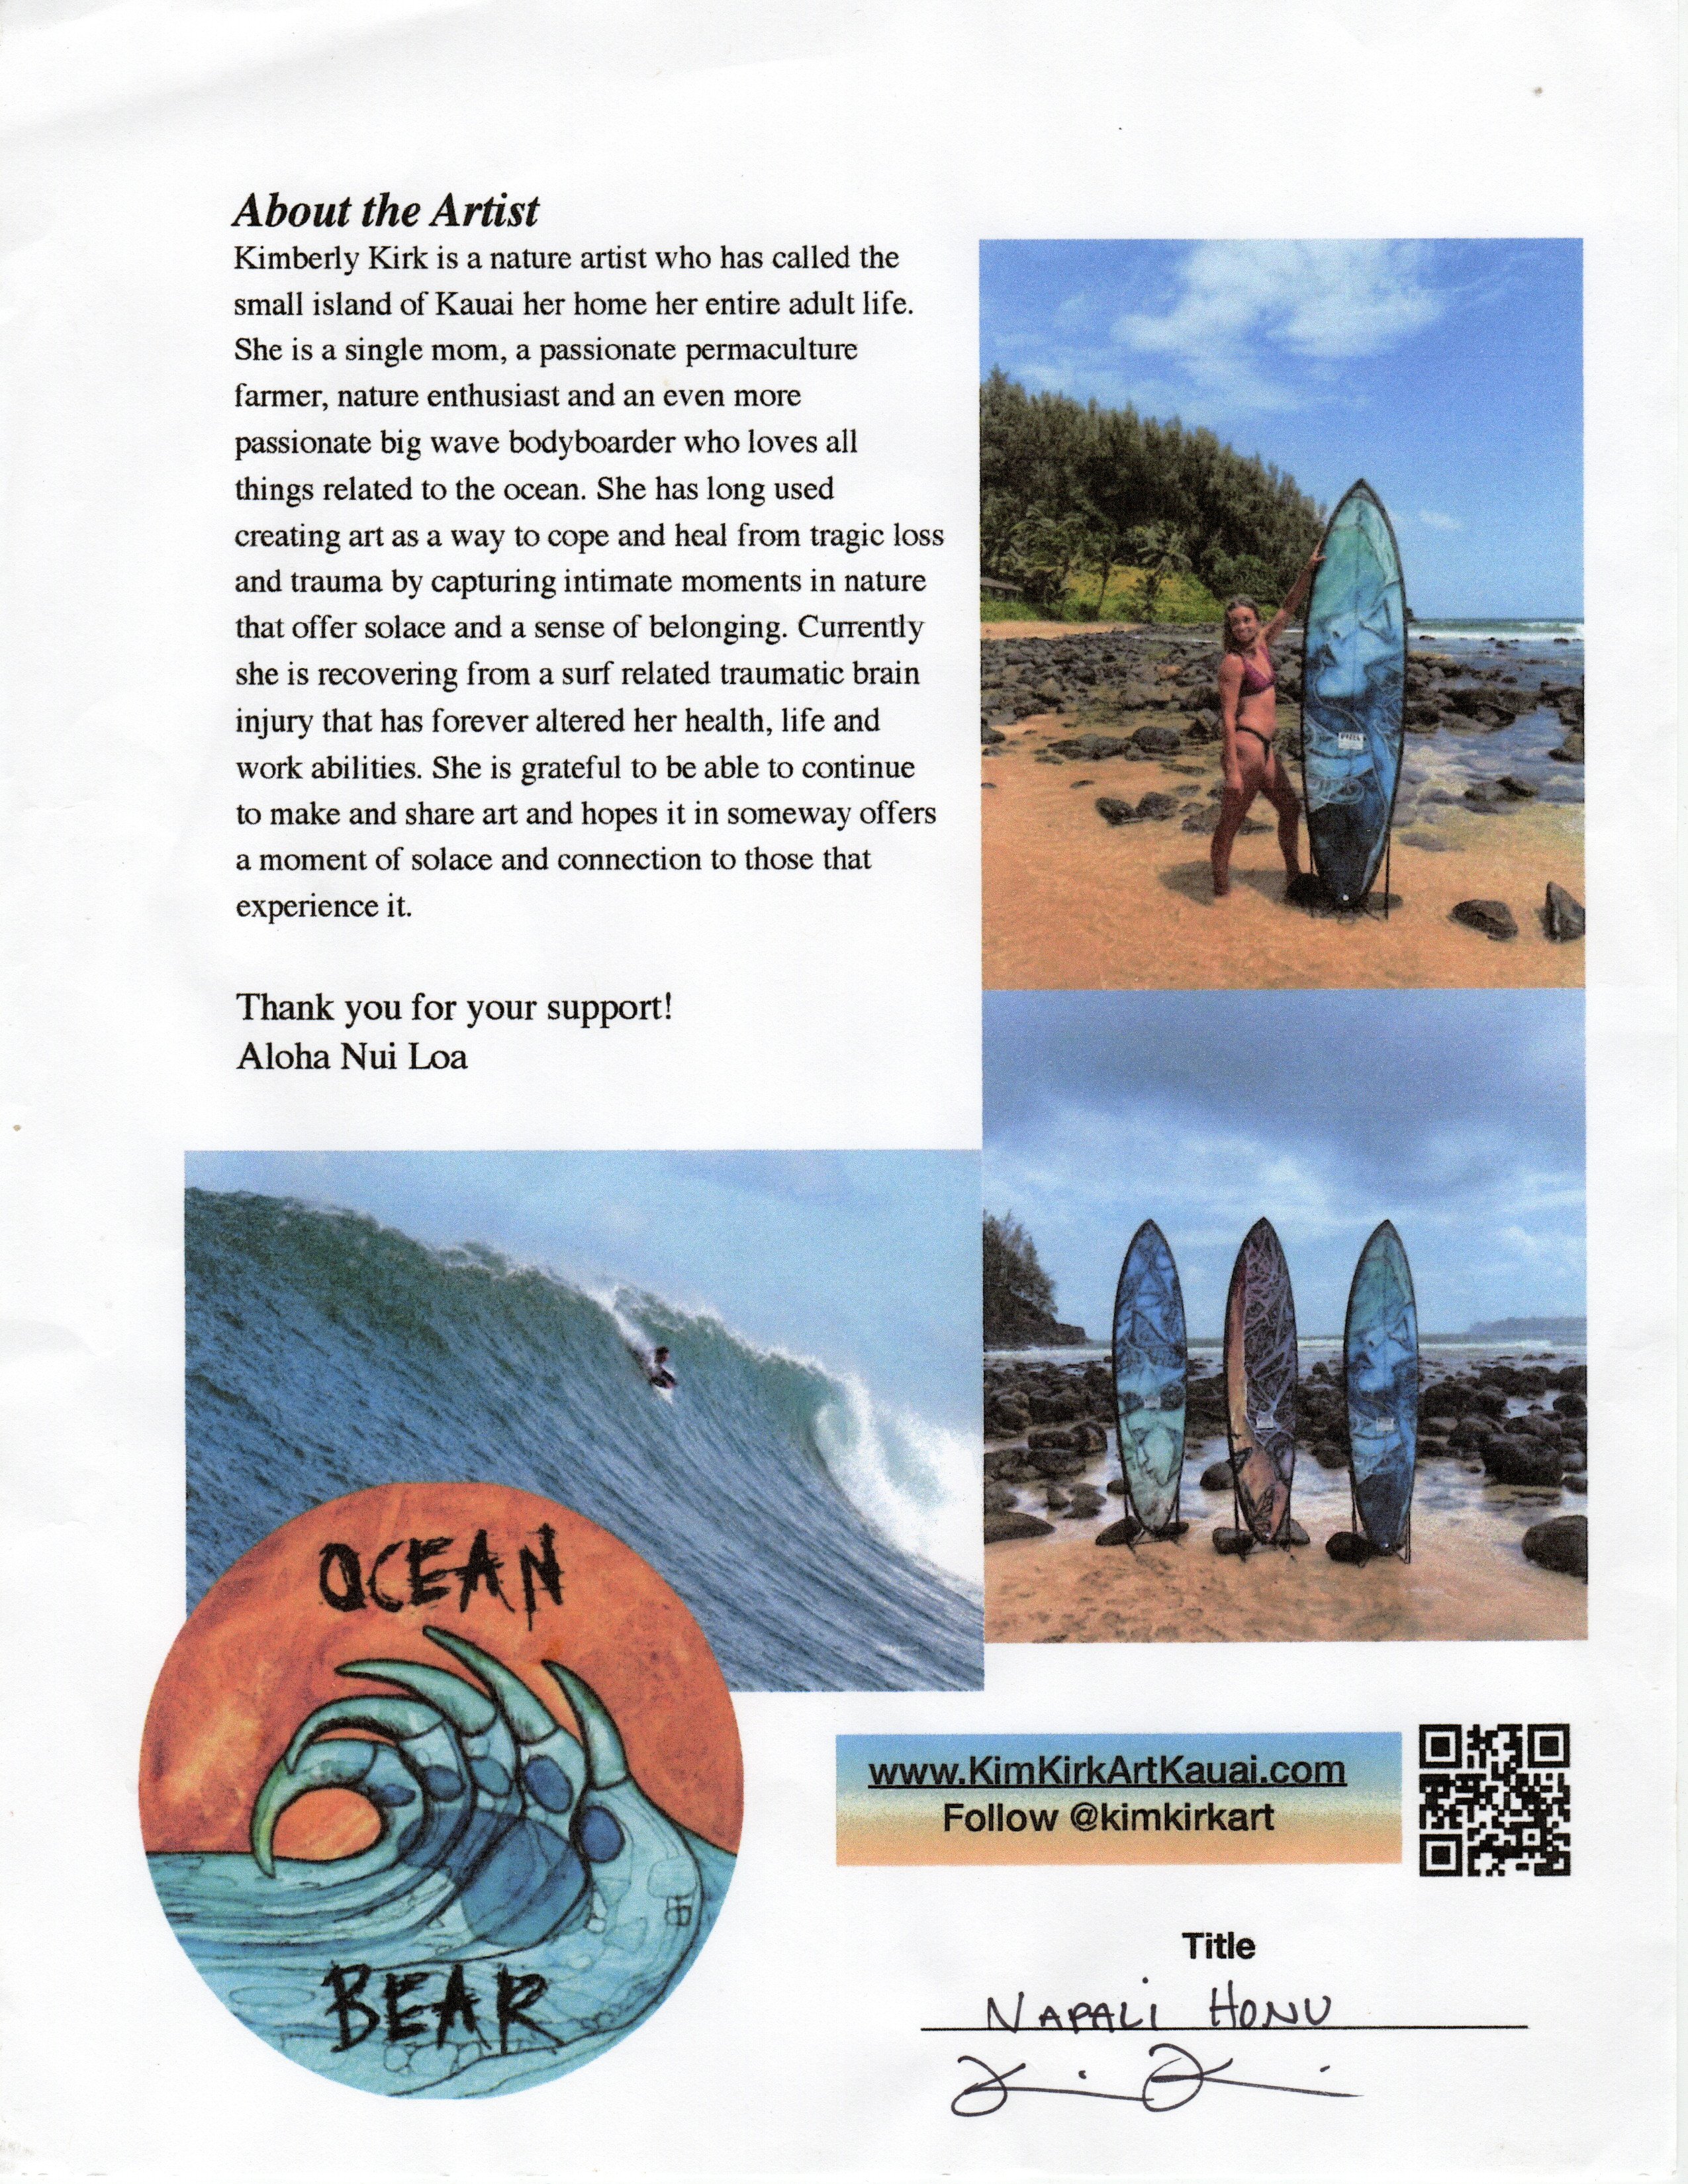
below, I've reproduced her two page flyer that she included with the painting. Take a look at her
information and Website.
The wood for the frame is "Plantation Teak". Basically, I went into the hardwood store and saw
this teak board for about 100 bucks and thought that "Plantation Teak" would make it sound like I
knew something about wood. It is a very beautiful wood with tight knots and varying coloration.
It's tough to work with and doesn't take well to the router.
My wife and I have been to Kauai several times. Two of those times we went on a catamaran tour
up the very rugged Napali Coast. This is where the island seems to just jut up like the giant
volcano it is, or was at one time. If you love geology, you'll love this. If you like snorkeling
with turtles, this is the place. If you like to imagine original Hawaiian people making their
living by the sea, you can just see it in front of you.
Kimberly Kirk Page 1
Kimberly Kirk Page 2
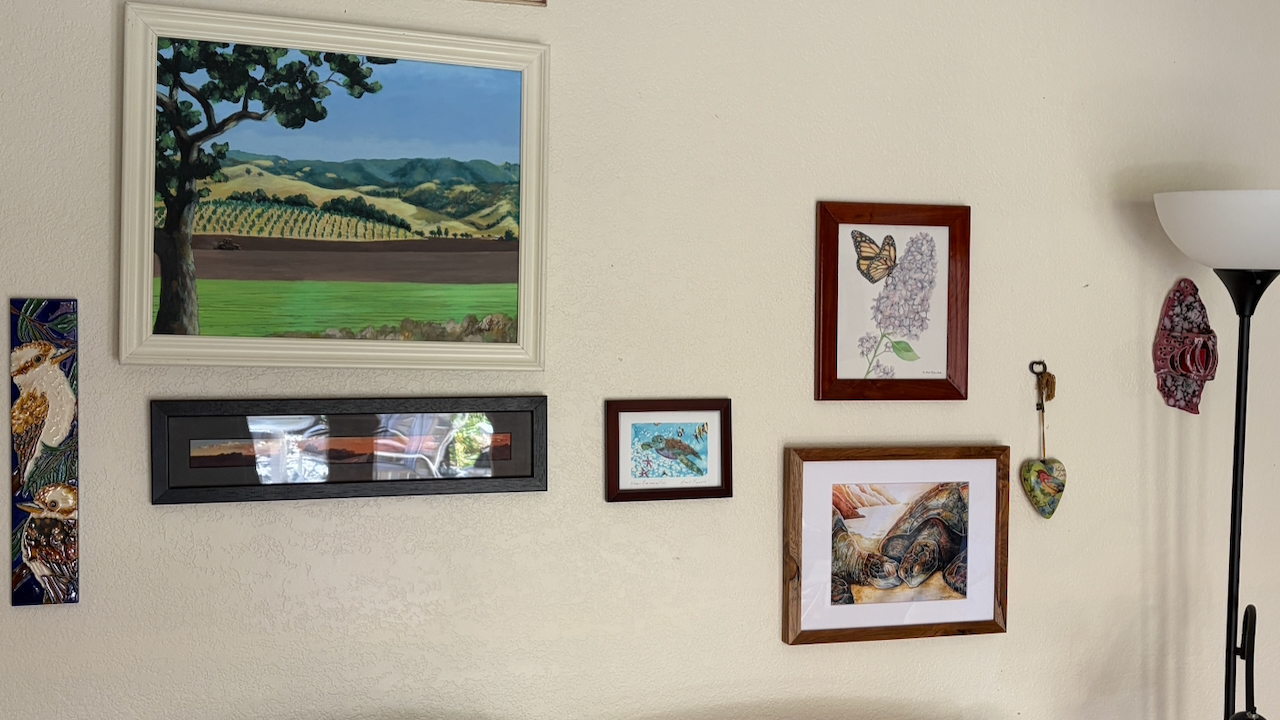
Side view of the frame
On the wall with other stuff
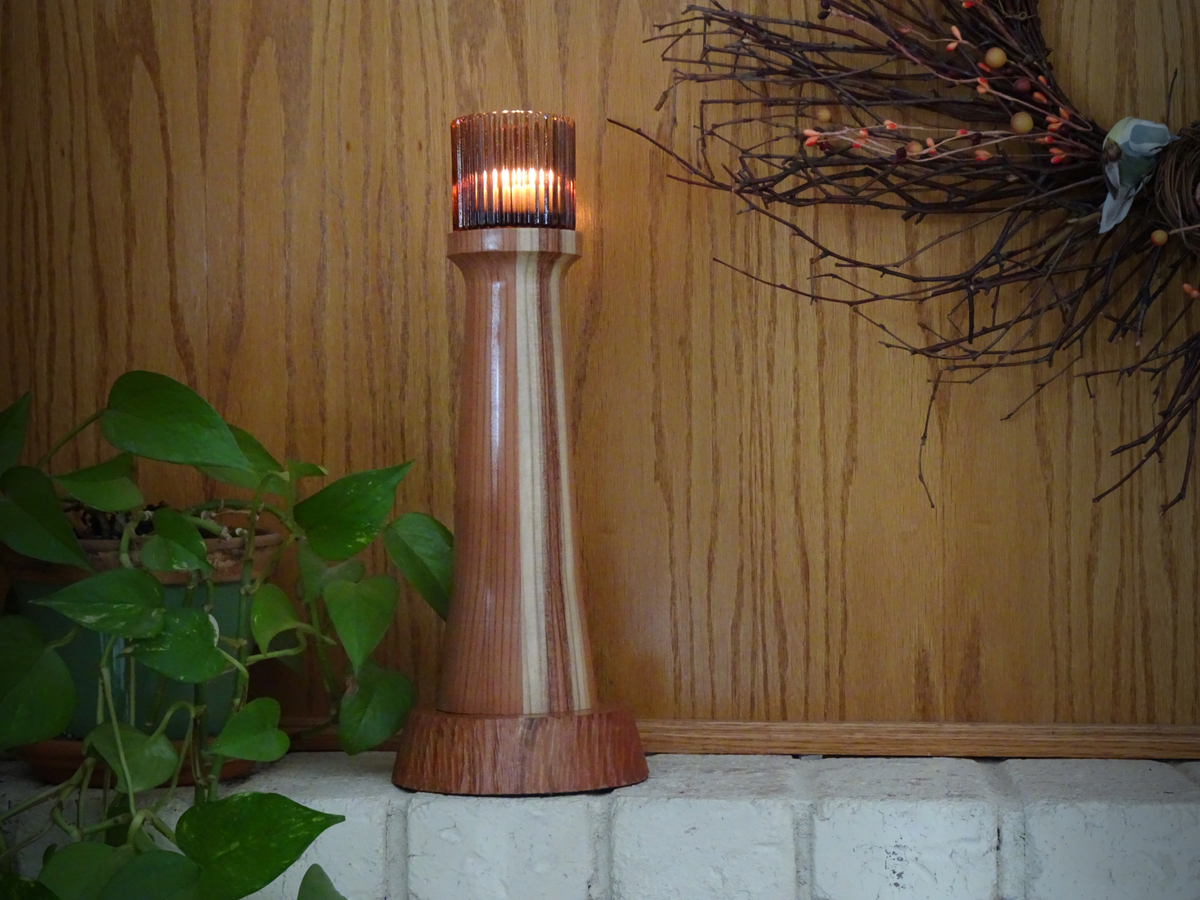
New Insulator Lighthouse 202531-Dec-2025
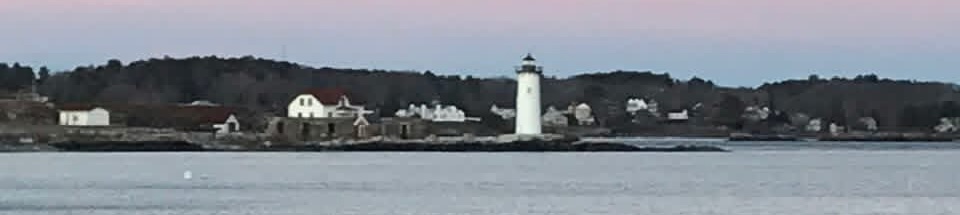
Portsmouth Harbor Lighthouse as seen from Great Island Common in New Castle, New Hampshire,
United States. The Portsmouth Harbor Light is a historic lighthouse located within Fort
Constitution in New Castle.
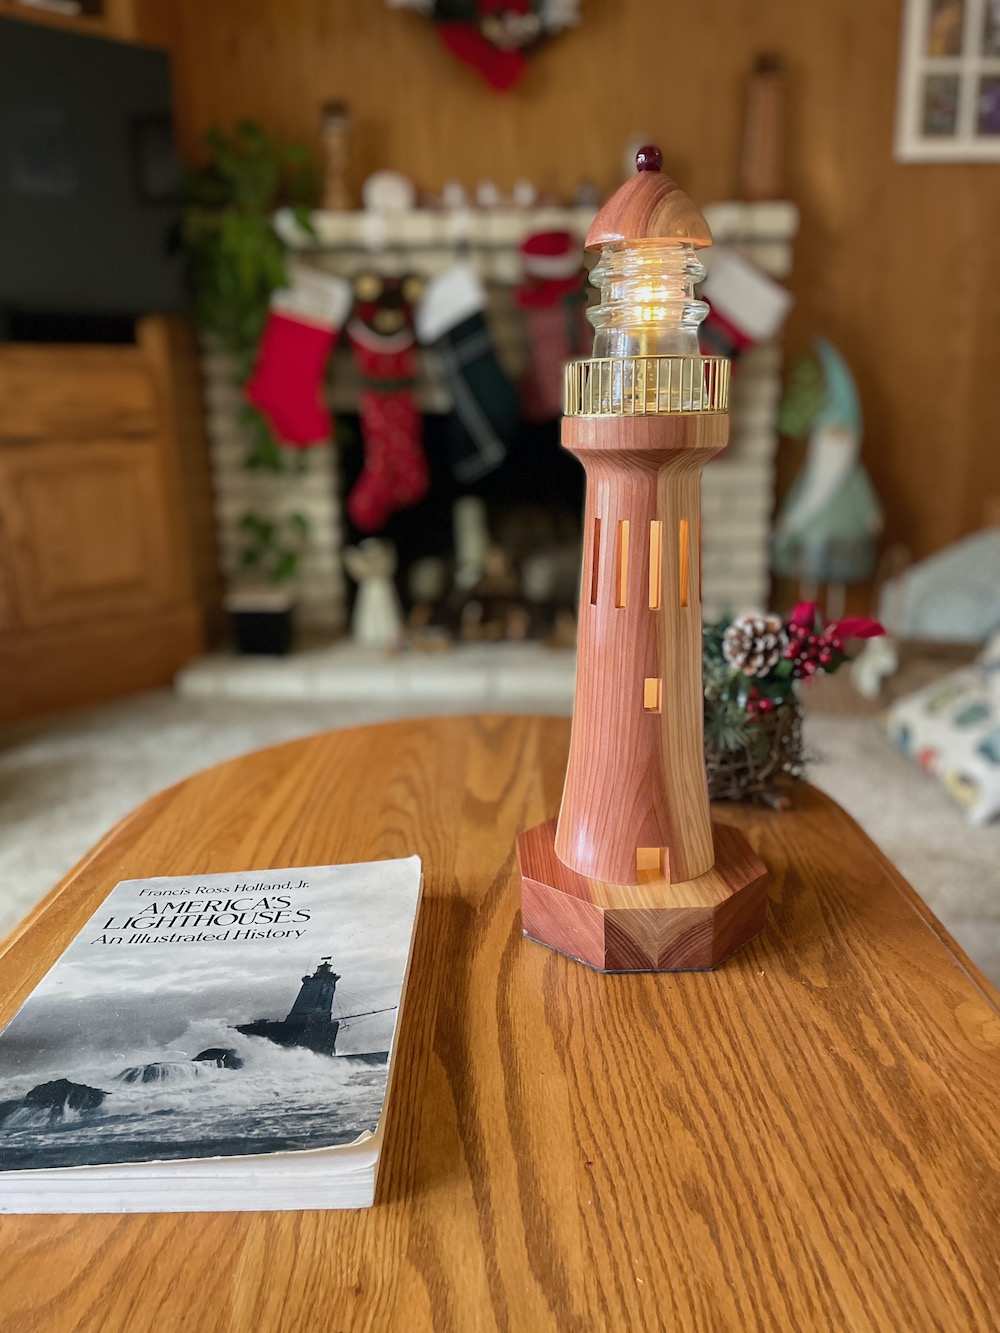
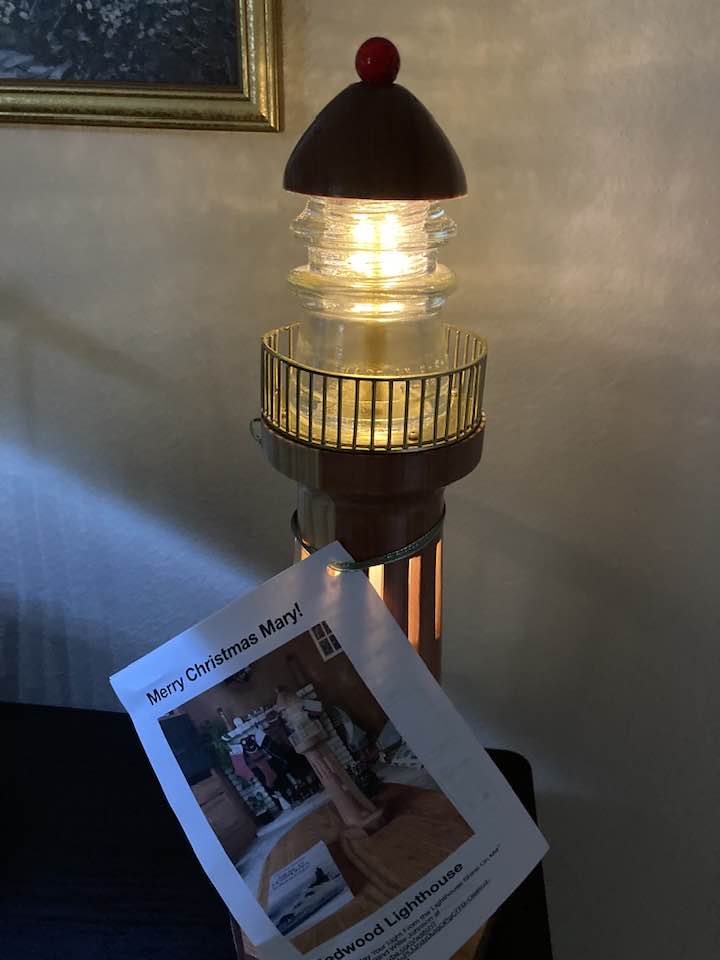
This year's latest lighthouse design has a newly designed light room that is removable for
repair. The wood is all California Redwood, showing the red heartwood and some of the white
sapwood. Click the image for a larger view.
This year's lighthouse design has a brighter look. That is, it has more lighting. The interior
is better illuminated and the antique glass insulator on top, which plays the part of the lens in the so-called
lightroom, has four LEDs in it.
A lovely thing happens to the light as it passes through these glass insulators. If you would
click on the image and look at the glass insulator you'll see that it has two prominent glass
ridges. Between those ridges is where telephone or power wires were once secured using wire ties.
But for us these ridges form lenses. The small horizontal array of LEDs in the center of the
insulator is lensed to appear as three horizontal light blobs arrayed vertically. If you blow this
picture up enough you can see the effect (I hope). It looks like a full lightroom. Also, to see
the effect in low light circumstances click here.
Another difference from past editions is the octagonal base. It just looks to me like part of the
foundation of the lighthouse. Previous versions had round conical bases with the conical side
surface scoured to resemble the rock on which the lighthouse stands. I may do that again in the
future. See my earlier designs by scrolling down.
As usual, the base contains the LED power unit that has three settings; OFF,
ON-timer, and ON-continuously. The timer position has lights on for the next six hours, off for
the following 18 hours, and repeat.
The Lightroom
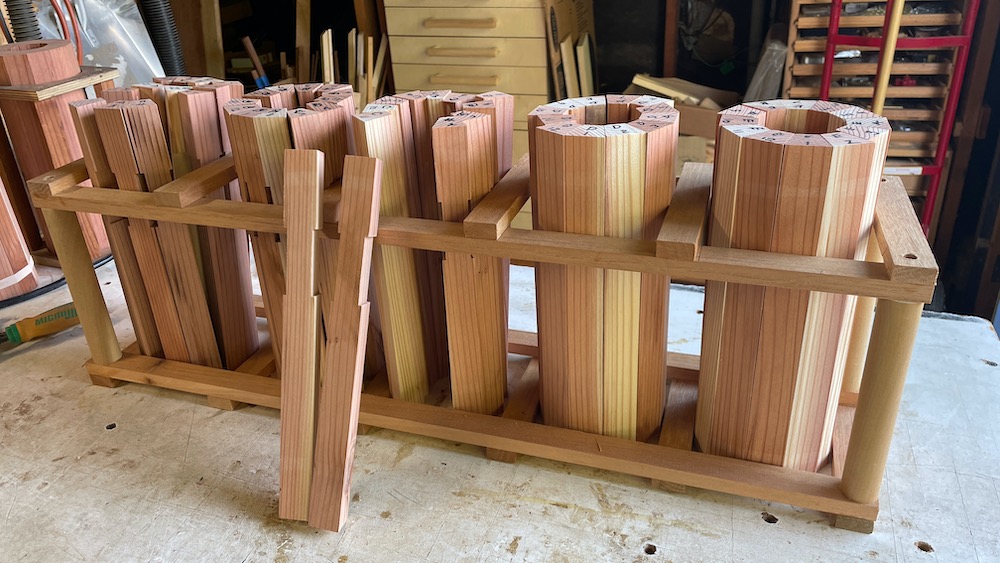
A Production Line
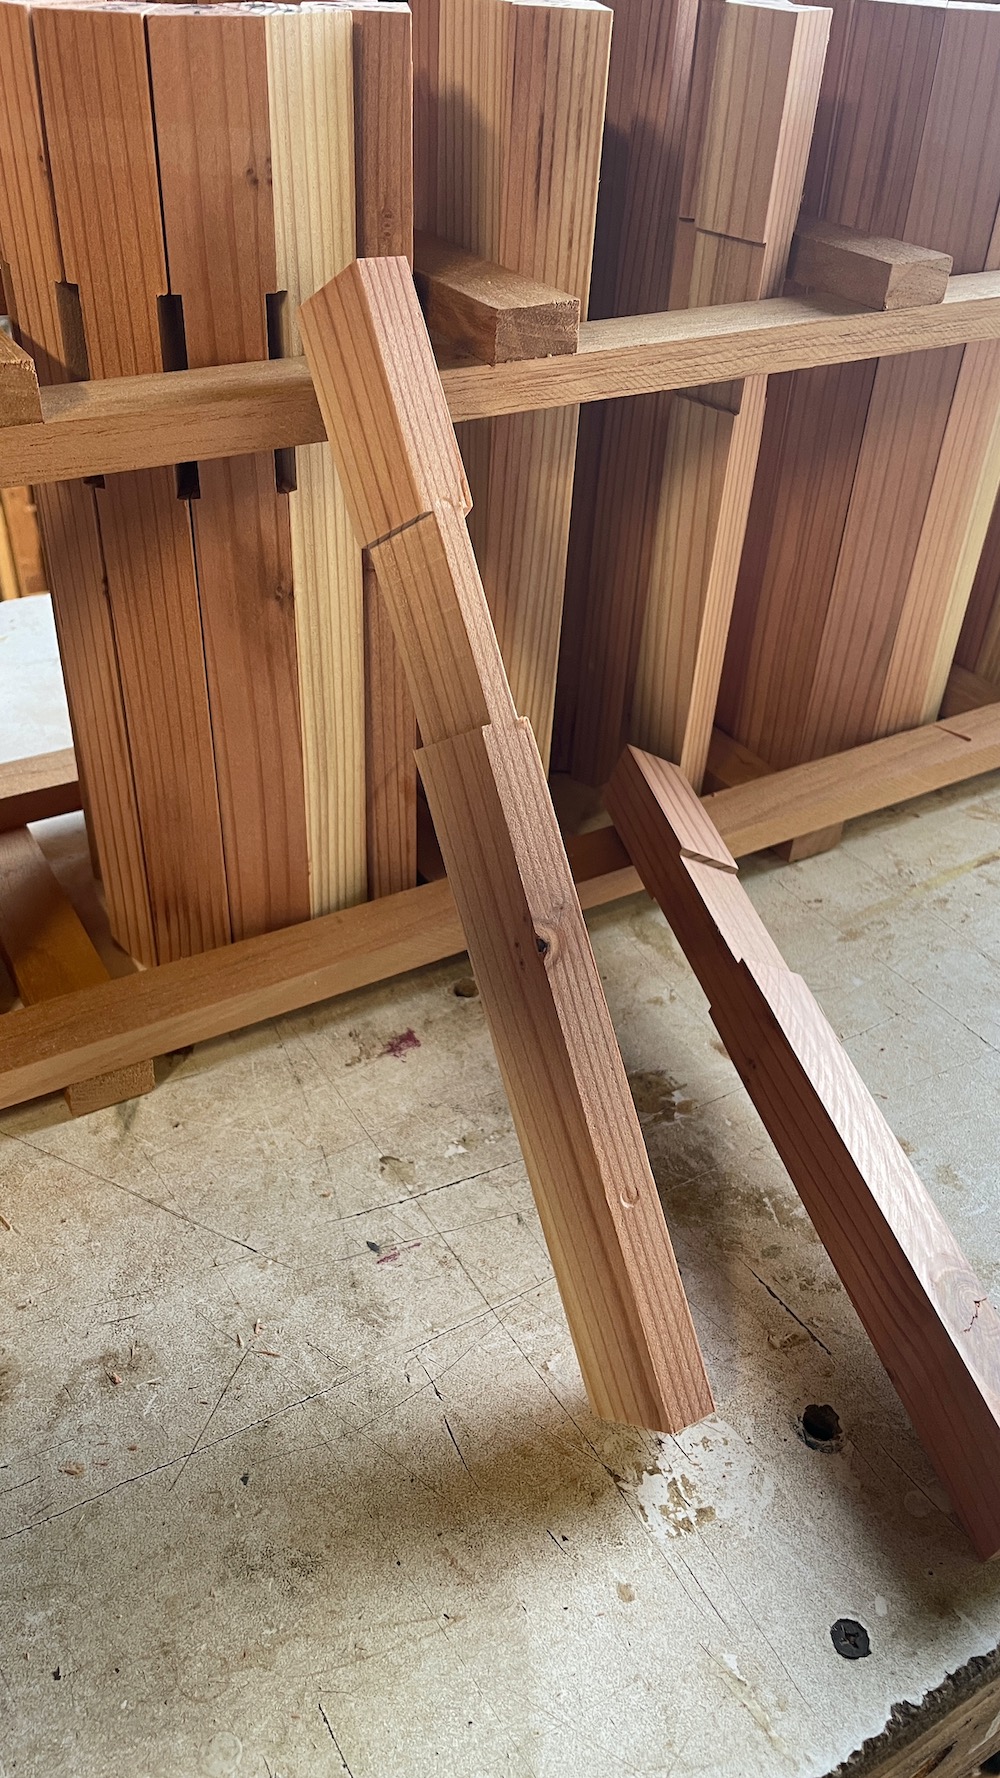
How the slots are cut
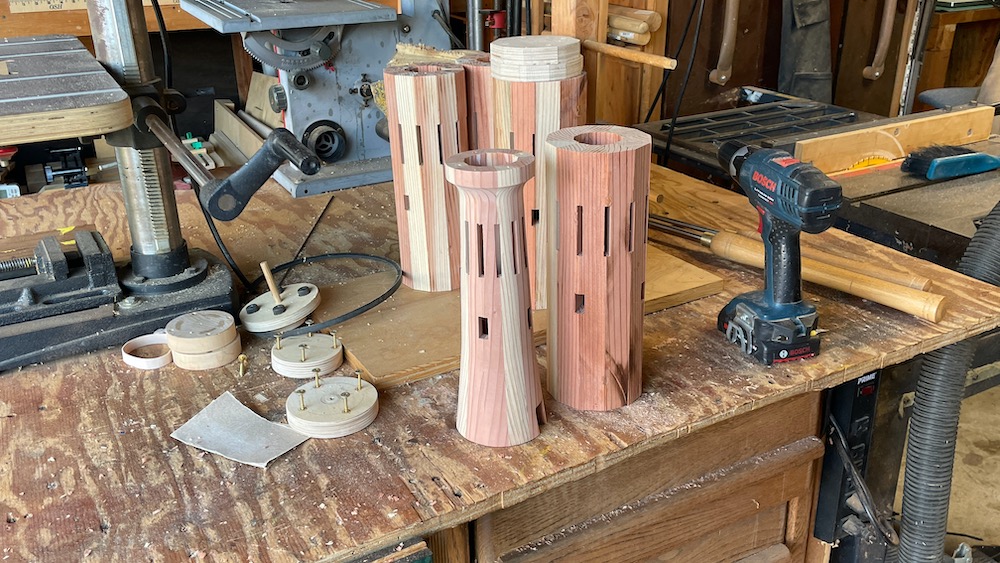
The Glue Ups
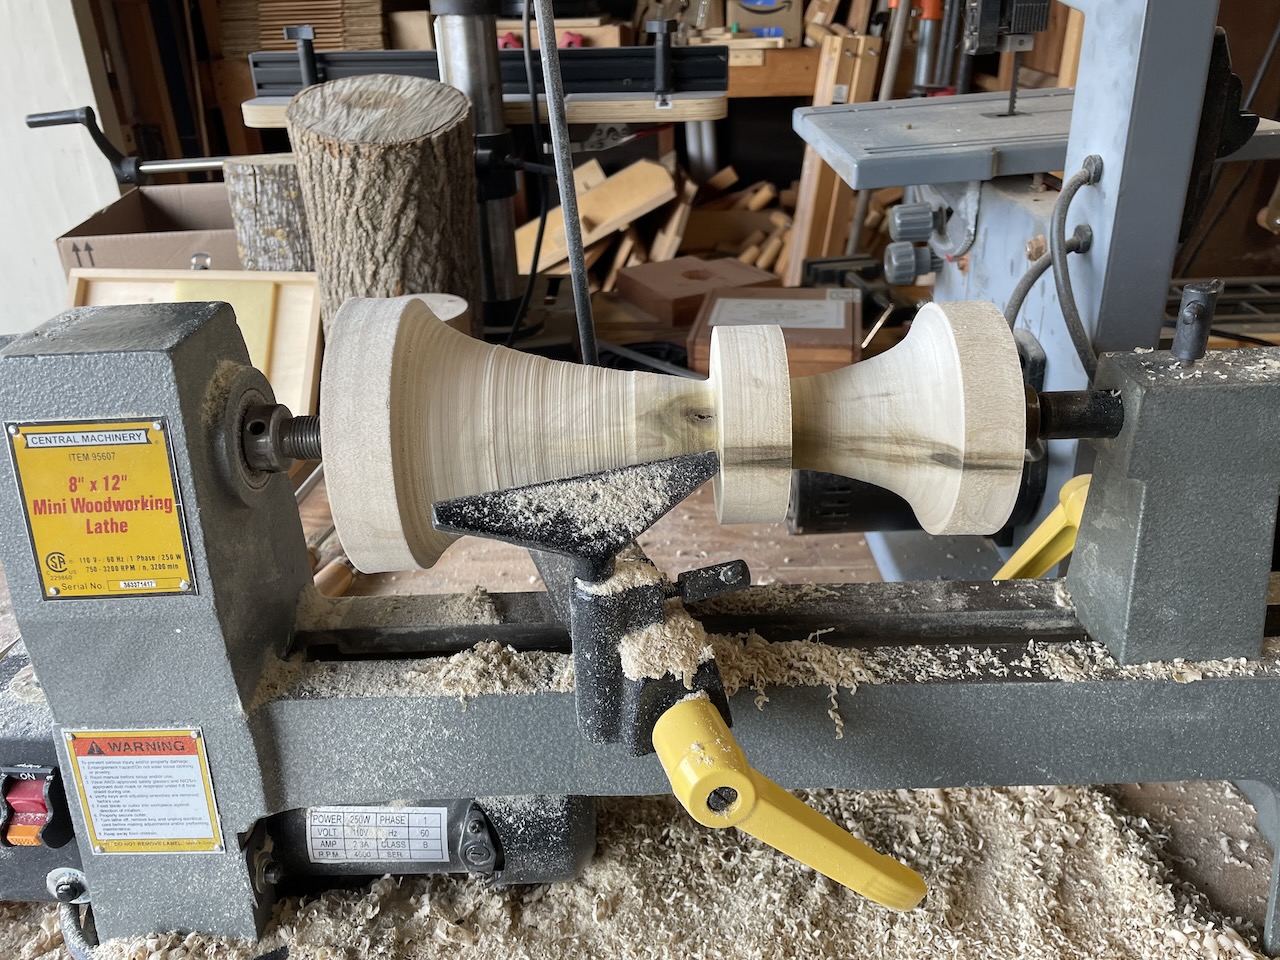
Starting to turn
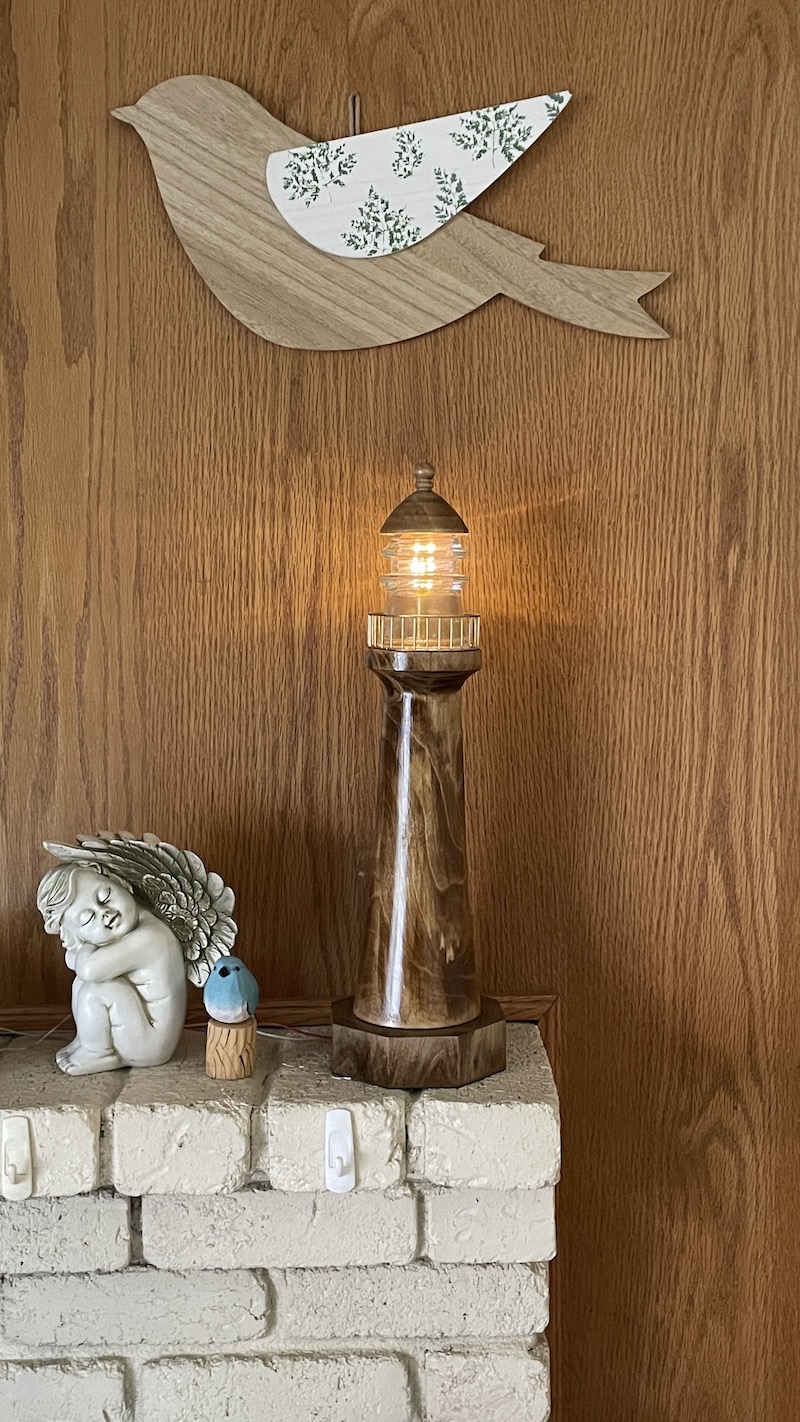
insulator lighthouse with a roof5-Jul-2025
click image for a different view.
The glass insulator for the lightroom at the top of this lighthouse is a Hemingray-17, as previously discussed. I've added a
roof on top and tried to stain all the wood. I don't think the stain looks good but others seem
to like it. The wood is from a tulip poplar which is notoriously hard to stain. I used the
pre-stain stuff like one is supposed to, but it may have made it more splotchy. A flat panel of
poplar may be stainable, but this is a turned piece to varying diameter and so may expose very
different fibers along the lighthouse's length.
anyway, it was our friend Duane's birthday recently and my wife and I decided to give this
one to her. It looks pretty good on her coffee table.
One question I received was how long the "light bulb" would last. So here's the story. I use
an led string from amazon. You can see it here on amazon. I modify the usual set up by using only 4 out of the
provided 30 LEDs. That cuts down on the battery current by about %80 or so. So, we get longer
battery life. Also, i spliced in some added resistance of about 67 ohms to cut the led current
down considerably. That makes the LEDs less bright but makes them last much longer. I'm guessing
maybe it will add 20 years to the life of the LEDs.
And anyway, as I told Duane, there is a lifetime guarantee on this piece as with all my
designs. That is, as long as I'm alive, I'll fix it!
If you're interested in the glass insulator collectables at the top, see my previous article
just below this one.
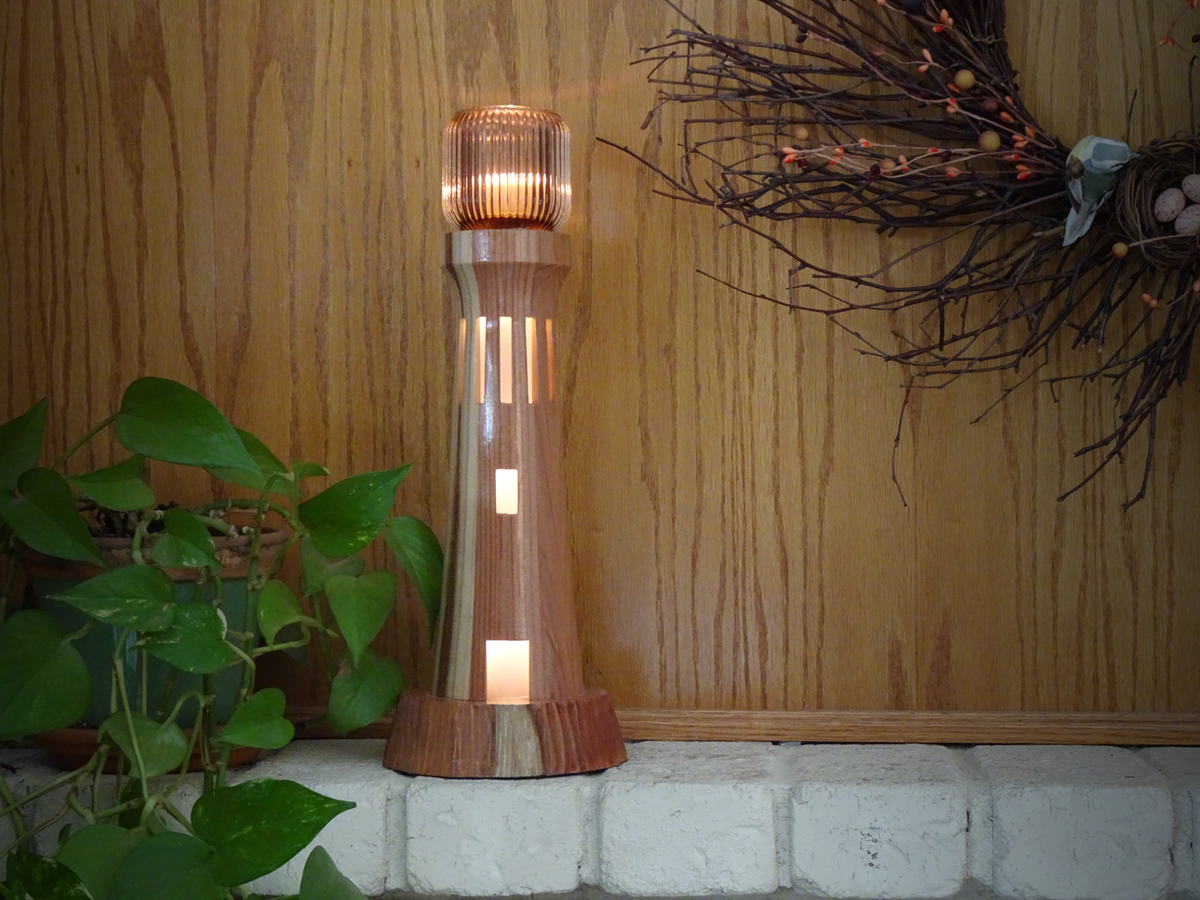
Insulator Lighthouse
The light room at the top of this lighthouse is an old power line/telephone insulator. Click
to enlarge.
The piece on the right is made from the same tulip poplar tree that was used to make the Candle Pedestals below. At the top of this "lighthouse", the
so-called light room, is an antique glass insulator. This one is a very common type know as the
Hemingray No. 17. There are many types of glass insulators like this one that were very widely
used to string power lines and telephone lines on power poles. You can read all about these
insulators on several Websites listed below. I think they are most thought of as living on poles
along train lines for train communication.
The LED lighting is powered by a battery pack under the
bottom. The lighting slide switch has three positions, (1) OFF, (2) TIMED: 6 hours on 18 hours
off, and (3) ON all the time. This is very similar to the lighting on the Candle Lighthouses
previously described below.
And oh yes I should mention the little brass railing around the light room at the top. I've
been trying to make one of these for quite some time. It's soldered together out of soft yellow
brass wire (14 Gauge) using a few special tools. This is the first time that it looks half
decent. If possible, I'll be putting these railings on most of my lighthouses from now on.
Checking to see how it will look. Click image for larger view.
A Little About the Making
After turning the basic shape and sanding, the next thing is to see how the insulator will fit
on top. At this point I'm planning for the LED lighting and what that will look like. I decided
to use the same battery pack and LEDs that I use on the Candle
Lighthouses that are shown below. (No candles, of course.) I want to place the LEDs about
where all the glass in smoothly rippling, which is the groove where the power line wire would
normally go. There are no sharp edges around there.
One part of the construction requires that a hole be drilled all the way through the turned
tower from top to bottom so the LED wires can be strung from the base to the insulator top.
I used what is called a bell hanger bit, a three foot long shaft with one end made into a
normal 3/8 inch drill for a few inches. It turns out that a bell hanger bit is not accurate
enough to go through a foot of wood. The shank is just too inaccurate. (Bell hanger bits are
used to drill holes inside a wall through the two-by-fours for stringing doorbell wire.) Next
time I'll use a so-called aircraft drill. It's much more precise in the shank. It seems actually
to be related to gun-drilling, the sort of thing that's used to drill long gun barrels.
Yes, there will be a next time. I'm planning two types of Insulator Lighthouses, one using
the Hemingray No.17 and the other the smaller Hemingray No. 9. Would you like one? Let me know!
I think they will be about $75.
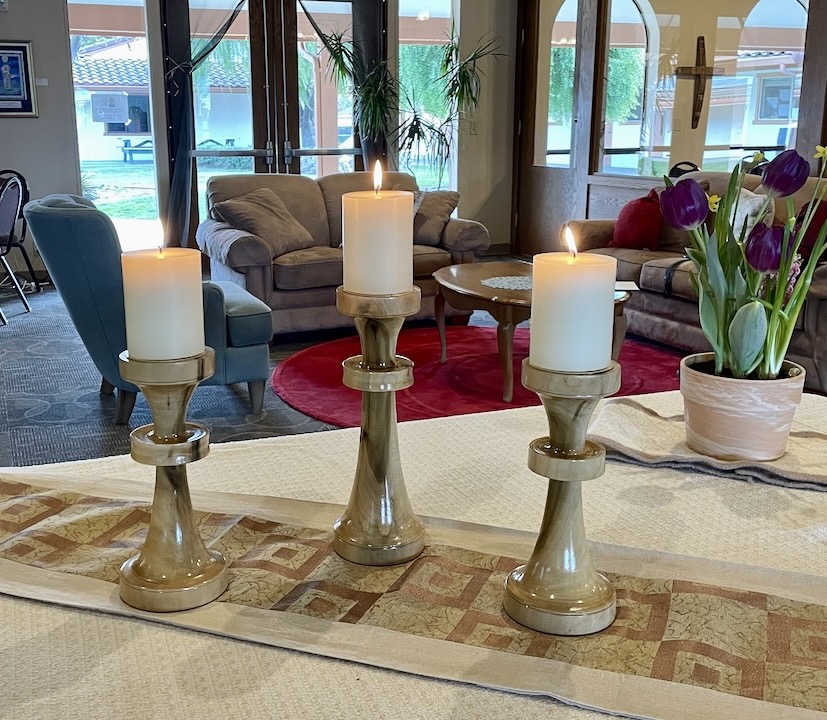
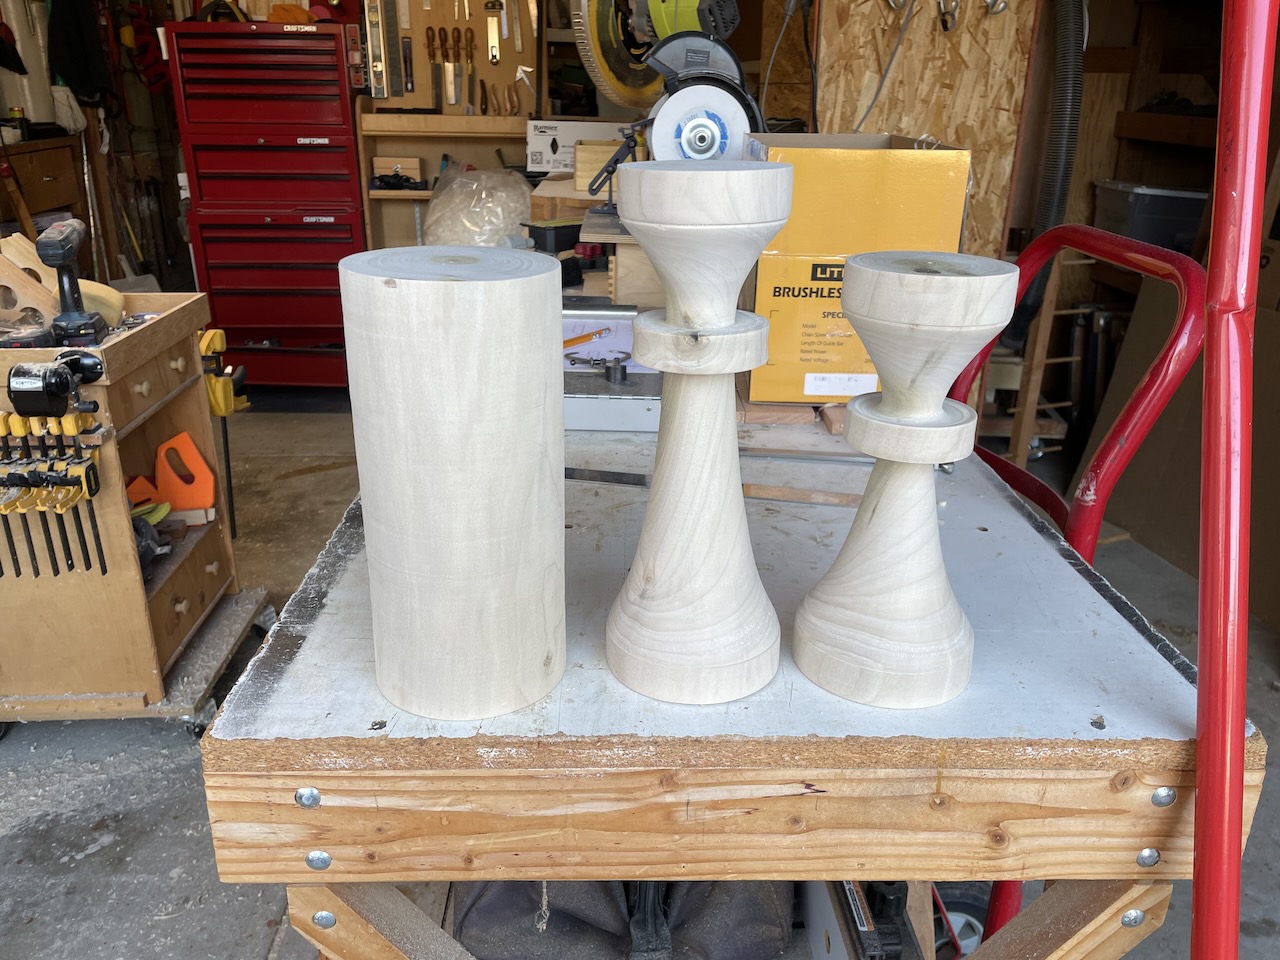
Candle Pedestals a la Church
Candle Pedestals made in honor of Advent's first pastor. Click on the picture a larger view.
These candle pedestals were made from fresh albeit dead Poplar, of the Tulip variety they
tell me. The tree was planted in honor of the Advent Lutheran Church's first pastor, The Rev.
Gary Berkland here in Morgan Hill, CA. He's still very much alive, but the poplar died anyway.
So, the idea was to do something with the tree to properly retire it. Much of it is still
sitting in my wood box so I'll have to think about what to do with all that, but these candle
pedestals were requested by the people of the church to honor their first pastor. And so I made
them. If you have a similar situation, let me know if I can help.
I got the idea for these from the Maltese Cross with its four lobes, and also from many
church items I've seen over the years. But they also reminded me and my wife of something else.
It took us a while, but these three things look rather like Lumiére of Beauty and the
Beast!. So now I call these things the lumiére Brothers.
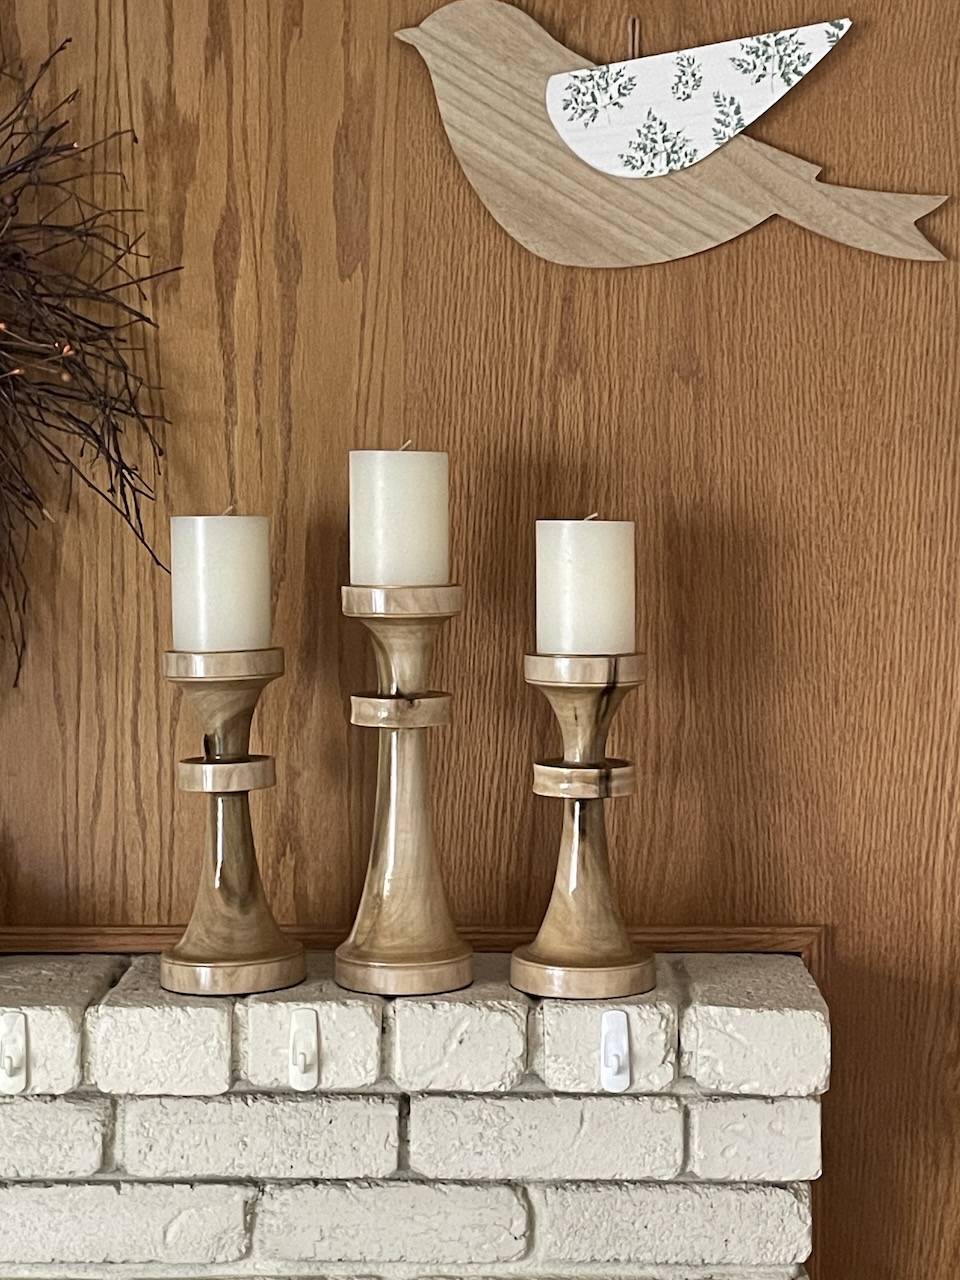
A little better detail of the poplar wood finish. Click for a larger view.
In this pic, I just wanted to show a little more detail about the wood. As you will see
below (should you choose to keep reading, thank you) the poplar appears very white and without
any grain detail, or of knots and other interesting flaws. My wife and I were disappointed in
its lack of prettiness and wood look. So, could poplar be made to show like a rich featured
wood such as redwood?
Normally I'd go to YouTube and get lots of amateur and possibly expert advice. And so I
did. It was a jungle of do this, do that, use a sealer, stain with water based.... I chucked
all that out and decided to do the very least possible. It's just wood, right? After the final
turning on the lathe, I sanded in the standard way, starting with coarse 80 grit sandpaper and
going all the way to 800 grit for the final sanding. That produced a very fine and smooth
surface, although far from shinny. It was still like white paper, to which it is obviously
closely related.
I simply went and got some regular Minwax Polyurethane of the high gloss variety, and
voila! It took a full four coats to get the finish you see. After that the natural grain
showed through, and even better, the different coloration of the wood as it goes from knots to
heartwood to sapwood showed really nicely.
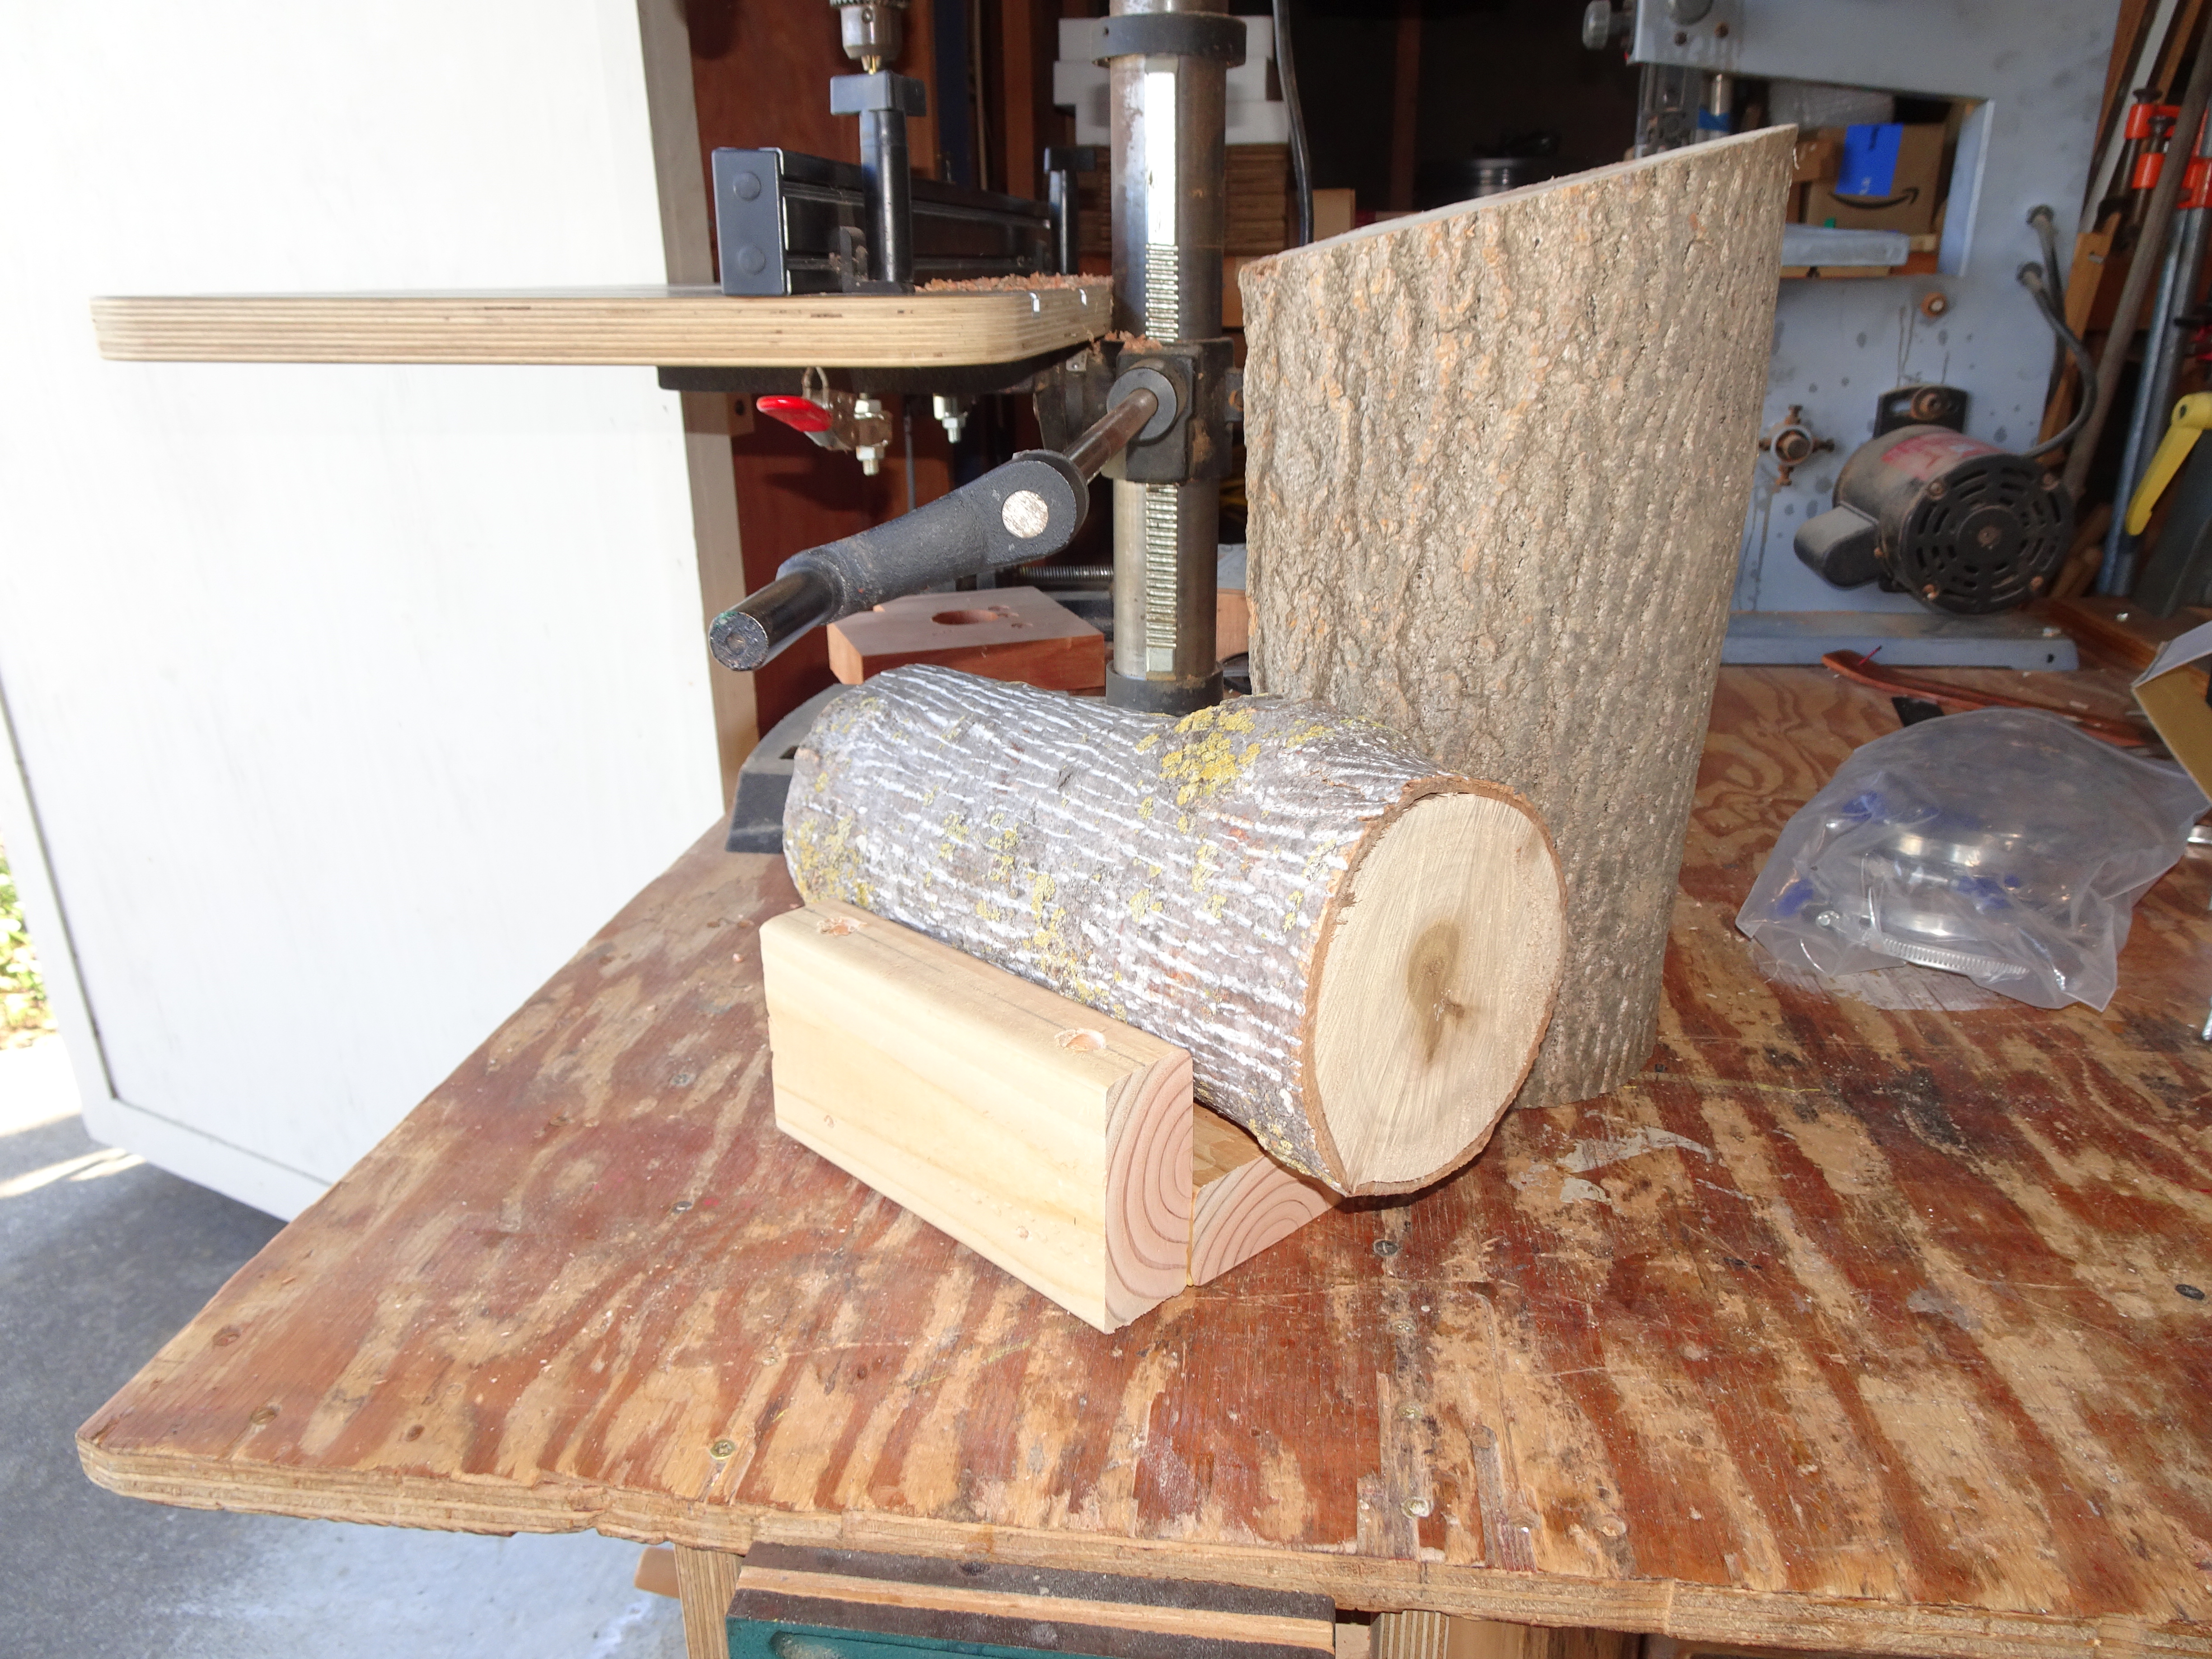
The poplar logs with bark getting loose. Click for larger view.
It was a beautiful tree when in bloom and green. Life in a churchyard must be risky for
plants. Over the years, the church folks have told me about waning trees so that we might
bring some sort of life back to it. And there seems now to be an olive tree getting dead
branches.
Anyway, the pic here shows some logs from the poplar tree just like the ones I used. The
first thing I do is cut the ends to get fresh and parallel surfaces for insertion into the
lathe.
Finally, something to start with. Click for larger view.
After a lot of learning, trying and some cursing, I finally got something to come out as I
mostly intended. I'm both learning to use the lathe in new ways and trying to produce
something of greater than zero value.
Well, two down, one to go. Click for larger view.
In this view I've still not attained the sweeping curvature I really wanted. So, these two
on the right seem a little wonky. Eventually I realized the best curve would be a section of
ellipse. Using CAD software I plotted out the exact ellipse for each of the three curves I
needed, and made templates to hold up to the workpiece to check my work. Long story short, it
eventually got done. The people seemed to like them and that's all that matters.
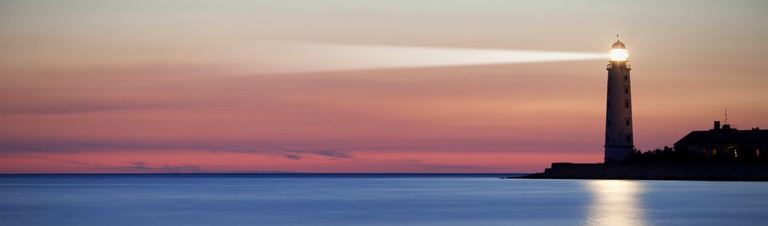
The light from the lighthouse brings home the traveler to safe harbor, and that makes an
irresistible spiritual analogy. "May the Light From the Lighthouse Shine On Me" was a
traditional gospel blues song recorded by many artists including Blind Willy Johnson's "Let Your Light Shine On Me" on YouTube. Listen to The Prairie Home
Companion version on YouTube here
Candle Lighthouse, with internal LEDs and candle holder 'lantern room' at the top.
This new design on the right is a tea light or votive type candle holder atop a tower
resembling a lighthouse. The lighthouse tower is internally lit with LEDs which illuminate
the window, door, and the "observation level" at the top. In this picture there is a lit
candle in the glass holder where the "light room" at the very top would be on a real lighthouse.
I made a dozen or so of these using California redwood, mostly the red heartwood, but the models
on display here were made with redwood heartwood with streaks of much lighter sapwood.
I call it Candle LightHouse. It stands just under 16 inches tall (40 cm) on a base of 6
inches diameter (7.6 cm). The LED lighting comes with battery pack which includes a timer that
can, if desired, turn on the lights for same 6 hours each day (all explained in a manual).
Other Versions
Piece 1. Click on image for a larger view.
This one was made in August 2024 from California redwood. There is both the red
heartwood and the lighter sapwood for accent. This piece is intended as a votive or vigil
candle, but it also looks good on the mantel in any case.
The glass candle holder is maroon with an inside diameter of about 2-1/4 in, (57 mm).
It's about that deep too, inside.
With Door and Two Windows
Piece 2. Click on image for a larger view.
I added a door and two windows to the design above, all lit by internal LEDs. The battery
pack is hidden in the base along with batteries. Most useful is the feature that allows the
LEDs to automatically be on for the same 6 hours each day that you choose.
A Little About the Making
On the right are the individual wedge-shaped pieces from which two towers will be made.
All the doors and windows are present in the pieces before thay are glued together. Three
glue-ups are on the left. Click on the image for a larger view.
As you can see in the photo on the right, the raw tower is a glue-up of 12 strips of
redwood. Each strip is made on the table saw using a special tooling set up in order to get
the exact shape so that they all fit together to form a cylinder. The cylinder can be seen on
the left.
While the strips, or sectors, are still individual, the slots for the door or windows are
cut in, again using a set up on the table saw. If all goes well, the twelve pieces are stuck
together with glue and held in place using large hose clamps.
When the glue is dry, the tower is then put on a small lather for turning. Redwood is
rather splintery and dry, so the process includes using a bit of water to soften the redwood
for easy and accurate cutting on the lathe. Most of the hard work is over at this point and
it's ready to have the lighting LEDs and the base put on. The last step is to bond the
candle holder, or "light room" on the top.
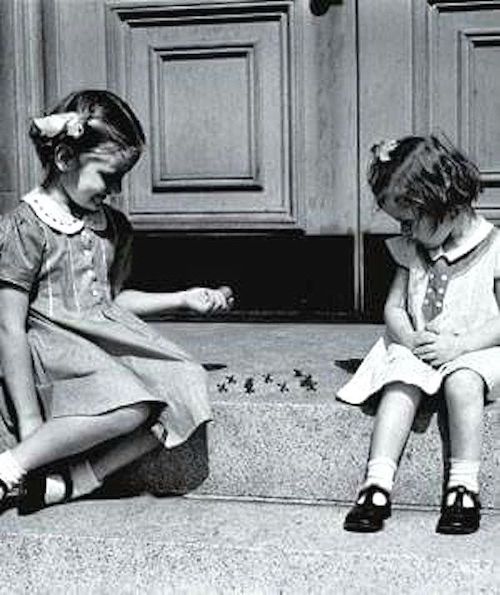
The old-time game of Ball and Jacks.
Close
×
That spiky thing in the middle of the logo (wich my daughter Sarah made for me)? They are
called "jacks" and were part of a game the girls used to play. They would take turns
bouncing a ball and while the ball was in the air, pick up as many "jacks" as they could
before catching the ball again in the same hand. So, I hope you get it; The banner says
"Jacks Redwood Crafts". Not terribly clever, I grant you. I never played jacks myself (girl
stuff you know), but I did play with the girls who played with jacks.